

Your compost starts stinking because the balance between wet, nitrogen-rich “greens” and dry, carbon-rich “browns” has gone wrong, which creates low-oxygen conditions where smelly anaerobic microbes thrive. Fix that balance and add air and absorbent browns, and your compost pile will stop smelling like rotten eggs or sewage.
You’ll learn which common mistakes—too many food scraps or grass clippings, not enough dry leaves or paper, poor aeration, or excess moisture—produce the worst compost smell. The next sections show how to spot each problem quickly and apply simple fixes that restore healthy, earthy-smelling composting.
Follow practical, low-effort steps to rebalance materials, turn and dry the pile, and keep smelly compost from coming back. Small changes to how you layer and manage your pile prevent most odor problems before they start.

Key Factors That Cause Compost Odor
A few simple imbalances—too much nitrogen, poor airflow, or the wrong ingredients—turn an earthy compost pile into a smelly one. Control the carbon-to-nitrogen mix, keep the pile aerated and at the right moisture, and avoid problematic food waste to stop compost odors fast.
The Role of the C Ratio (Carbon-to-Nitrogen Balance)
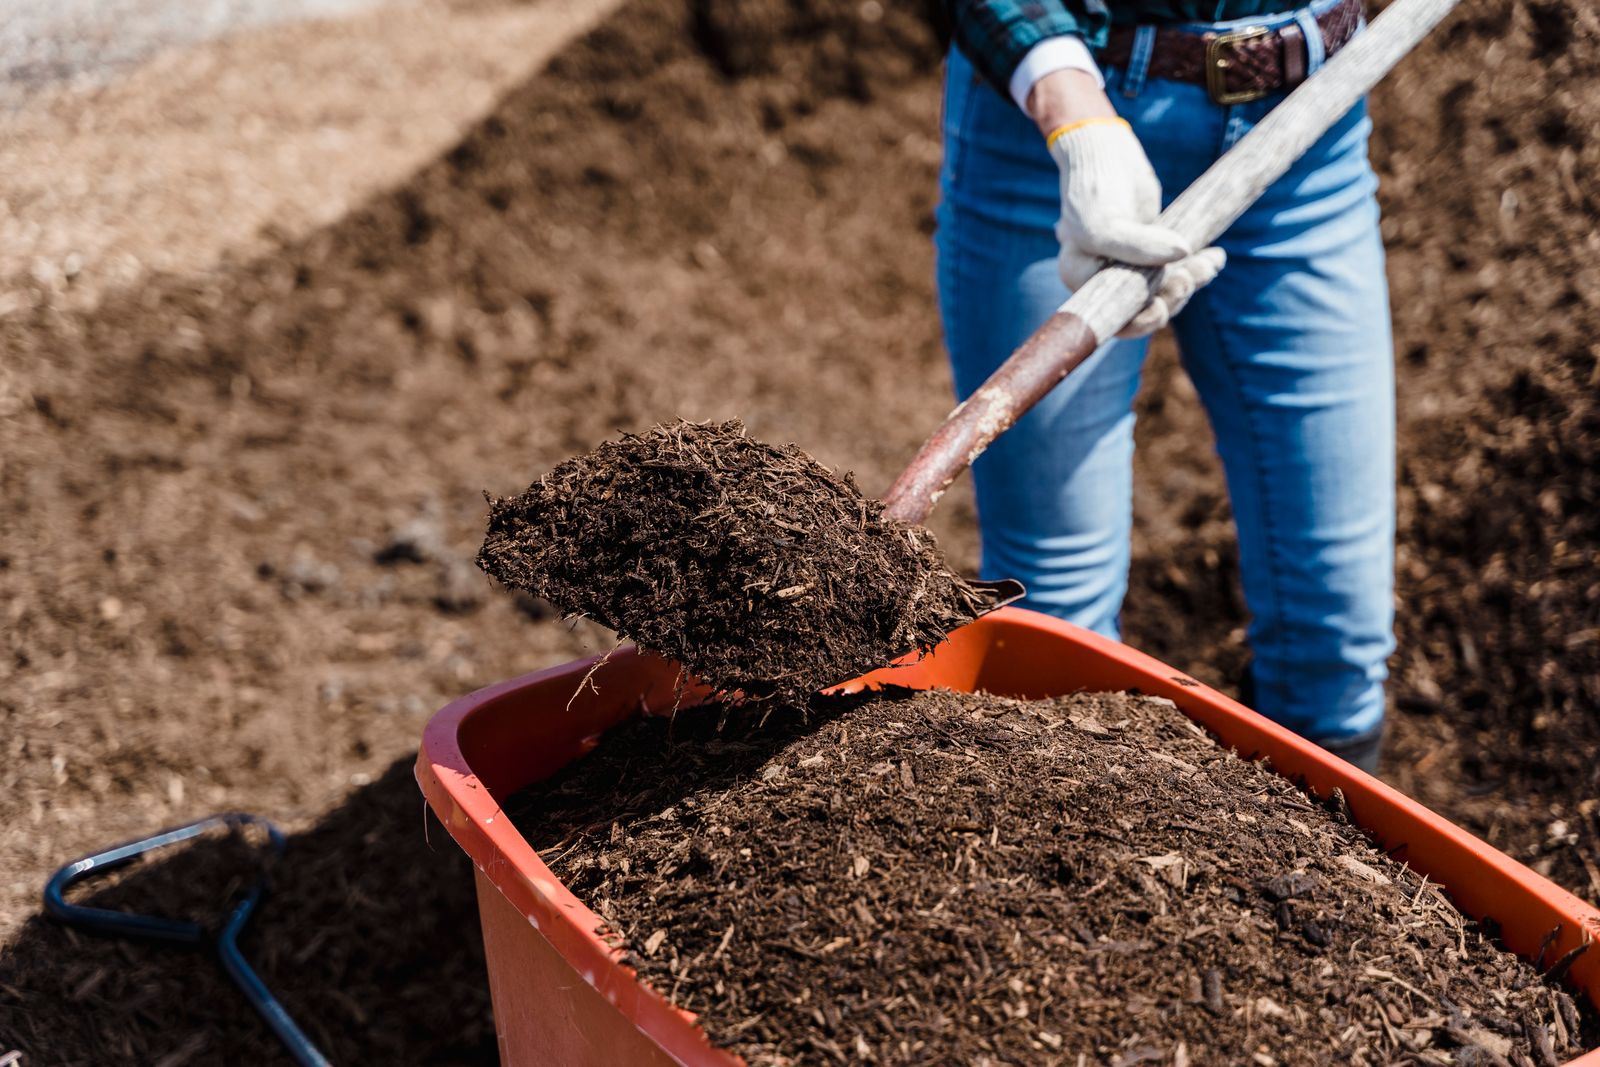
The C ratio determines which microbes dominate your compost. Aim for roughly 25–30:1 (carbon: nitrogen) in your pile; typical “browns” like dry leaves, straw, or shredded cardboard supply carbon, while “greens” like grass clippings and kitchen vegetable scraps supply nitrogen. Too much nitrogen (low C) fuels fast anaerobic bacteria and produces ammonia or rotten-egg smells. Too much carbon (high C) slows decomposition and can leave materials undecomposed.
Adjust the ratio by adding bulking materials: if your compost bin smells strongly of ammonia, add dry leaves, shredded paper, or small wood chips. If decomposition stalls and the pile seems inactive, add fresh greens or a small amount of garden soil to reintroduce microbes. Mix layers so greens contact browns rather than forming clumps, which helps microbes access both elements evenly.
Oxygen and Moisture: Preventing Anaerobic Conditions
Compost needs oxygen. When air can’t reach interior layers, anaerobic bacteria take over and produce sour, rotten, or sulfur-like odors. Keep piles loose and add coarse bulking materials—twigs, wood chips, or straw—to maintain channels for airflow. Turning the pile every 1–2 weeks helps refresh oxygen but avoid over-disturbing hot piles if you’re targeting high-temperature composting.
Moisture should feel like a wrung-out sponge: damp but not dripping. Excess water fills pore space and suffocates aerobic microbes, creating wet, rotten smells. If your compost pile smells like sewage or vinegar, it’s likely waterlogged—add dry browns and increase turning frequency. In arid conditions, lightly water new layers to sustain microbial activity without saturating the pile.
Common Ingredient Mistakes: Meat, Dairy, and Excess Greens
Certain ingredients reliably cause problems in backyard composting. Meat, dairy, oily foods, and cooked scraps attract pests and create strong odors as they decompose anaerobically; avoid them unless you use a hot, sealed system or industrial composting service. Stick to fruit and vegetable scraps, coffee grounds, and egg shells for your compost bin.
Excess fresh greens like large amounts of grass clippings also trigger bad smells if you don’t mix them with enough browns. Layer fresh clippings thinly or dry them briefly before adding, and always cover greens with a good thickness of leaves or shredded paper. If a section of your outdoor compost is particularly smelly, remove the offending layer, add carbon-rich material, and turn to reintroduce oxygen.
Practical Solutions for Odor-Free Composting
Keep moisture near a wrung-out sponge, mix carbon-rich and nitrogen-rich materials, and ensure steady airflow so aerobic microbes can dominate. Small changes—right layering, occasional turning, and the right container—fix most smells quickly.
How to Restore the Right C Ratio
Aim for about 25–30 parts carbon to 1 part nitrogen by volume. If your pile smells like ammonia, add dry browns: shredded paper, dry leaves, sawdust, or cardboard. Spread 2–3 inches of browns over every inch of food scraps and mix them through the active zone with a pitchfork or compost aerator tool.
Measure roughly: a handful of fresh grass clippings needs a couple of handfuls of shredded newspaper or dry leaves. For persistent ammonia, add a 2:1 volume of browns, then turn the pile and recheck after 3–5 days. Finished compost or garden soil also helps seed beneficial microbes.
Aeration Techniques and Tools
Air keeps decomposition aerobic and odor-free. Turn a static pile every 7–14 days with a pitchfork or use a dedicated compost aerator to pull air into the centre without full turning. For faster heat and less smell, use a compost tumbler—rotate it 3–4 times per week during active hot composting.
In large outdoor compost piles, build in coarse bulking agents (twigs, wood chips) to maintain air channels. If you suspect anaerobic pockets, insert a long rod or pipe to relieve compaction and then fork the pile. Use a compost thermometer to check that hot compost reaches and sustains ~130–150°F (54–66°C) to accelerate breakdown and reduce odors.
Proper Handling of Food Scraps and Layering
Handle kitchen waste to minimize smell and pests. Chop or shred food scraps, bury them at least 6–12 inches into the pile, and always cover with a 2–3 inch layer of browns. Avoid adding meat, dairy, or oily foods to outdoor compost; if you use them, prefer sealed systems or bokashi composting first.
For daily use, keep a small lidded counter caddy and empty it into the bin promptly. When adding large amounts of greens (e.g., after mowing), layer thinly and alternate with thicker brown layers. Maintain drainage in the bin so liquid won’t pool at the bottom.
Choosing the Best Compost System for Your Space
Match the system to your lifestyle: a compost tumbler suits small yards and fast hot composting with minimal turning. A ventilated compost bin or open windrow works for larger yards but needs more turning and monitoring. For apartments or limited outdoor space, use bokashi composting to pre-ferment scraps and then bury the fermented material in soil or add to a compost bin.
If you want low-maintenance outdoor composting, choose a bin with good ventilation and room for bulking materials. For frequent food-scrap users, a dual-bin setup lets one side cook while you add to the other. Place bins on bare soil to allow worms and microbes access and avoid impermeable platforms that trap moisture.