


Clean air vents are one of the simplest ways to protect your indoor air quality, keep energy bills in check, and extend the life of your heating and cooling equipment. To do that well, you need to know which vents you are looking at and how to clean each type without damaging it. This guide walks you through the most common vents in and around your home and shows you how to maintain them with the same care a professional would use.
Once you can tell a supply register from a return grille or a bathroom exhaust from a dryer vent hood, you can match each one with the right tools, cleaning schedule, and safety steps. The payoff is cleaner air, fewer odors, and a system that does not have to fight through layers of dust every time it turns on.
Know your home’s main vent types
The first step is understanding what you are actually cleaning. In a typical centrally heated and cooled house, you will see a mix of supply vents that blow conditioned air into rooms and return vents that pull room air back to the system. Guides on What Are the Different Types of Vents in Your Home explain that supply and return vents work together so air is distributed as supply air and then recirculated, which is why both sides need attention when you clean. In most rooms you will find one or more louvered vents called Registers, usually on supply vents, often with a rolling or lever control that lets you adjust airflow.
Beyond those basics, homes often include floor, wall, and ceiling registers, bathroom exhaust vents, kitchen range hoods, and exterior terminations for dryer ducts and whole house systems. A breakdown of types of vents highlights that you may also see soffit and roof vents, gable vents, and foundation vents that support attic and crawlspace ventilation, even though you do not feel air blowing through them the way you do at a register. Knowing which vents move conditioned air and which simply let your house breathe helps you decide how often to clean each one and what level of DIY work is appropriate.
Supply and return registers: the workhorses of your HVAC
Supply vents are the most visible part of your system, and they are also the ones that tend to collect dust bunnies and pet hair where everyone can see them. A detailed overview of An Overview of HVAC Vents and Registers notes that Supply Vents are the most common type, delivering conditioned air into each room, and that their placement depends on the HVAC setup. Because they constantly push air out, their louvers and frames trap airborne dust that can eventually restrict flow and redistribute particles back into the room.
Return vents, often larger and sometimes located on walls or ceilings in hallways, pull room air back through a filter and into the ductwork. In duct design references on HVAC systems, supply diffusers, grilles, and registers are distinguished from filter returns, which sit in front of a filter and can accumulate lint and debris more quickly. When you clean, treat both supply and return faces the same way: remove surface dust, wash removable covers, and avoid pushing grime deeper into the duct where only professional tools can reach.
Why vent cleaning matters for air quality and efficiency
Dirty vents are not just a cosmetic problem, they affect how your home feels and how hard your equipment has to work. Step by step guidance on Improves Indoor Air Quality explains that Cleaning air vents is essential because dust, dander, and other particles that settle on vent covers can be blown back into the room every time the system cycles. Over time, that buildup can aggravate allergies and make surfaces around the vents grimier, which is why regular wiping and occasional washing of covers is recommended.
There is also an efficiency angle. When vents and nearby duct openings are clogged, your system has to push harder to move the same amount of air, which can shorten component life and raise energy use. Industry best practices for Best Practices for Maintaining Cleaner ducts emphasize controlling the dust and debris that can enter ducts at the registers, along with using proper filtration, to keep the entire system cleaner between professional visits. Keeping the visible vents clean is one of the easiest ways for you to support that larger goal.
Safety first: power, tools, and what you should not touch
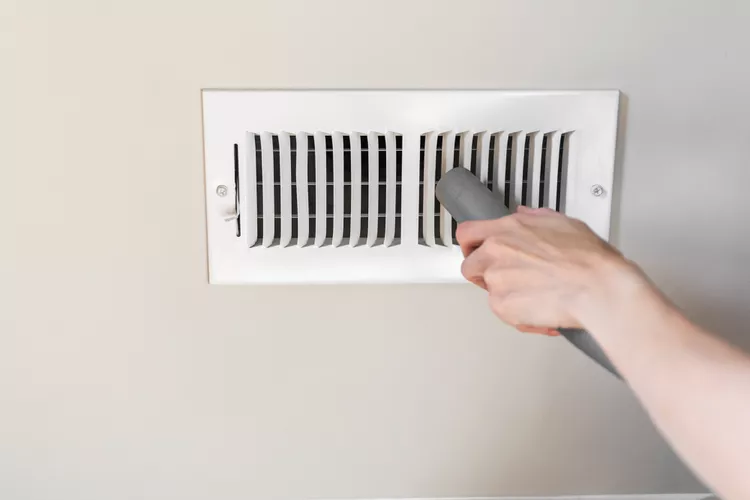
Before you loosen a single screw, you should think about safety. Multiple how to guides stress that you should Turn off the power to the connected HVAC system and Always start by turning the power off to the connected HVAC system, which will prevent any potential accidents while you are working near moving components or electrical connections. A similar checklist on how to safely clean your vents advises that For safety reasons, you should turn off the system before you remove covers or accidentally damage any moving components, and that you should Gather Your Supplies so you have a screwdriver, vacuum, and microfiber cloth ready.
Once the system is off, focus on what is safe for a homeowner to handle. A step by step guide on How to Safely Clean Your HVAC Vents recommends using a screwdriver to remove vent covers, vacuuming loose dust with a brush attachment, and dampening a microfiber cloth with mild cleaner to wipe surfaces, then letting covers air dry completely before reinstalling. It also notes that Dirty air filters can contribute to buildup at the vents, especially in homes with pets, so replacing filters on schedule is part of safe and effective vent maintenance.
Step-by-step: cleaning wall and ceiling vents
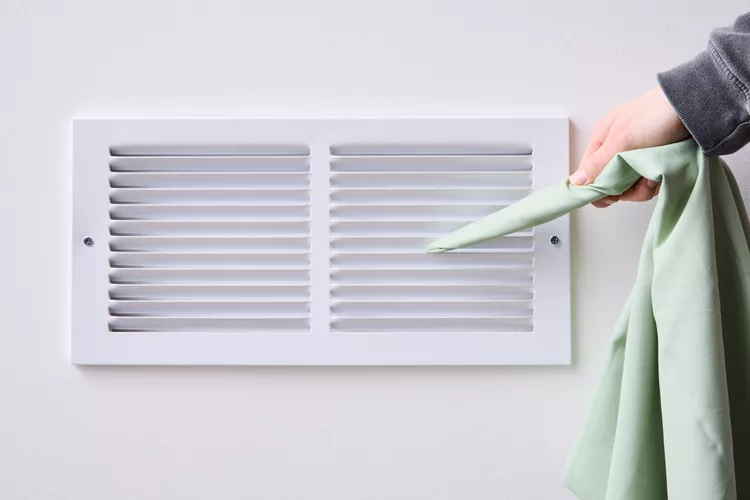
Wall and ceiling vents are usually metal or rigid plastic, which makes them straightforward to clean if you follow a simple sequence. One widely used approach starts with turning off the system, then unscrewing the vent covers and soaking them in warm water with a bit of soap so surface grime can loosen. A how to guide on Here is What To Do explains that you should Turn off the power connected to the heating and air conditioning system, Unscrew the air duct covers, and then decide whether to continue with DIY cleaning or call a professional to do the job if you see heavy buildup deeper in the ducts.
For vents that can be cleaned in place, a detailed Step by Step Guide to Cleaning Plastic Air Vents suggests Removing the Vent Cover when possible, and notes that If the vents cannot be removed, you can still use a soft brush and vacuum to reach between the slats. With the vent covers out, a small brush can be very helpful for getting into corners before you rinse and dry them. Once everything is clean and fully dry, you simply replace the vent covers and restore power so the system can circulate air through freshly cleaned openings.
Floor registers and baseboard vents: dust traps at ground level
Floor vents and baseboard registers sit where dust, crumbs, and pet hair naturally settle, so they often need more frequent attention than ceiling vents. A practical guide on Using a Dishwasher to clean metal floor vents notes that you should Determine the composition of your vents first, since in most cases vents made of metal can be cleaned in your dishwasher, while wood vents should be cleaned by hand and dried quickly and completely to protect the finish. Before you wash anything, it helps to vacuum around the opening so debris does not fall into the duct when you lift the cover.
Once the covers are off, you can vacuum inside the duct opening with a hose attachment to remove loose dust within reach. Tips on How to Clean Your Home and Air Registers emphasize that Fortunately, You can clean them with basic tools like a vacuum, mild soap, and a soft cloth, and that keeping these low level vents clear helps airflow and reduces the dust that gets blown across floors. If you have baseboard style vents, the same principles apply, but you may need a narrow brush to reach behind the fins without bending them.
Bathroom exhaust, whole-house ventilation, and dryer vents
Not all vents in your home are tied directly to heating and cooling, but they still need regular cleaning to work properly. Bathroom Vents, for example, pull moist air out of the room to prevent mold and peeling paint, and instructions on Jul cleaning guidance say you should Gently pull down on the vent assembly until the fan and mounting wires are exposed, remove the cover, wash it with a damp cloth, then reassemble once everything is dry. That same gentle approach protects the fan motor and wiring while you vacuum dust off the blades.
Beyond individual rooms, many homes rely on mechanical systems to refresh indoor air. Technical guidance on One of the most common types of whole building ventilation describes simple exhaust ventilation, where exhaust fans run continuously or intermittently, often with a dedicated controller, to remove indoor air. The exterior hoods for these systems, along with dryer vents, can collect lint and outdoor debris, so installation guides recommend that you Check the vent hood frequently and brush out any visible buildup, and that When you are ready to install your dryer vent you follow best practices outlined in Check the instructions to keep exhaust paths clear and safe.
DIY vent cleaning methods that actually work
Once you know which vents you are dealing with, you can choose DIY methods that are effective without being overly aggressive. A detailed breakdown of What Are the Best DIY Vent Cleaning Methods explains that Understanding Vent Cleaning Importance starts with recognizing how dust and allergens collect at the vent openings, and that Manual cleaning techniques are an effective way to remove surface buildup. These techniques include using a soft brush to loosen grime before rinsing and drying removable covers, and using a vacuum with a brush attachment to capture loosened debris.
For stubborn dust on vent covers, a Soft bristled brush can make the job easier. Guidance on dust free, odor free vents notes that a Soft bristled brush removes tenacious dust and debris off vent covers without scratching the finish, especially when paired with a mild cleaner. For car interiors, where vents are smaller and more delicate, interior care experts advise that Absolutely a vacuum with a narrow crevice tool or brush attachment removes dust, crumbs, and lint from inside the vents, and that you can use a detailing brush to loosen stubborn debris before vacuuming it away, as outlined in Absolutely detailed instructions.
When to call in professional duct cleaning
There is a clear line between cleaning vent covers and trying to scrub the inside of your ducts. Surface work at the registers is safe for most homeowners, but deep duct cleaning requires specialized equipment and training. Professional guidance on Our HVAC cleaning process describes how a reputable HVAC company follows a proven, industry standard process to ensure every inch of ductwork is properly cleaned, using negative pressure machines and agitation tools that go far beyond what a household vacuum can do.
You should consider calling a pro if you see heavy, matted dust or mold inside the duct opening, if there are persistent odors even after you clean the vents, or if you suspect construction debris or pests inside the system. Consumer facing guides on What To Do emphasize that after you Turn off the power and Unscrew the covers, you should stop and call a professional to do the job if you encounter anything beyond light dust. That way you protect your ducts, your equipment, and your own safety while still keeping the visible vents as clean as possible between professional visits.
More from Decluttering Mom: