They can turn a simple Trader Joe’s bunch into a florist-quality Valentine’s bouquet with a few smart choices and easy tricks. Choose a strong focal flower, add two types of filler and lush greenery, trim and prep stems properly, and arrange in a glass vase for a polished, lasting look.
She’ll walk through how to pick and prep the best Trader Joe’s blooms, what to trim and when to cut stems, and practical arranging tips that make a casual bunch look professional. Expect quick, budget-friendly hacks that save time without sacrificing style.

Picking and Prepping the Best Trader Joe’s Flowers
Trader Joe’s offers a rotating selection, so shoppers should aim for strong color contrasts, a mix of focal blooms and airy fillers, and stems with firm, green bases. Inspect for fresh cut ends, no brown edges, and buds that are beginning to open rather than fully spent or tightly closed.
Choosing the Right Bloom Combinations
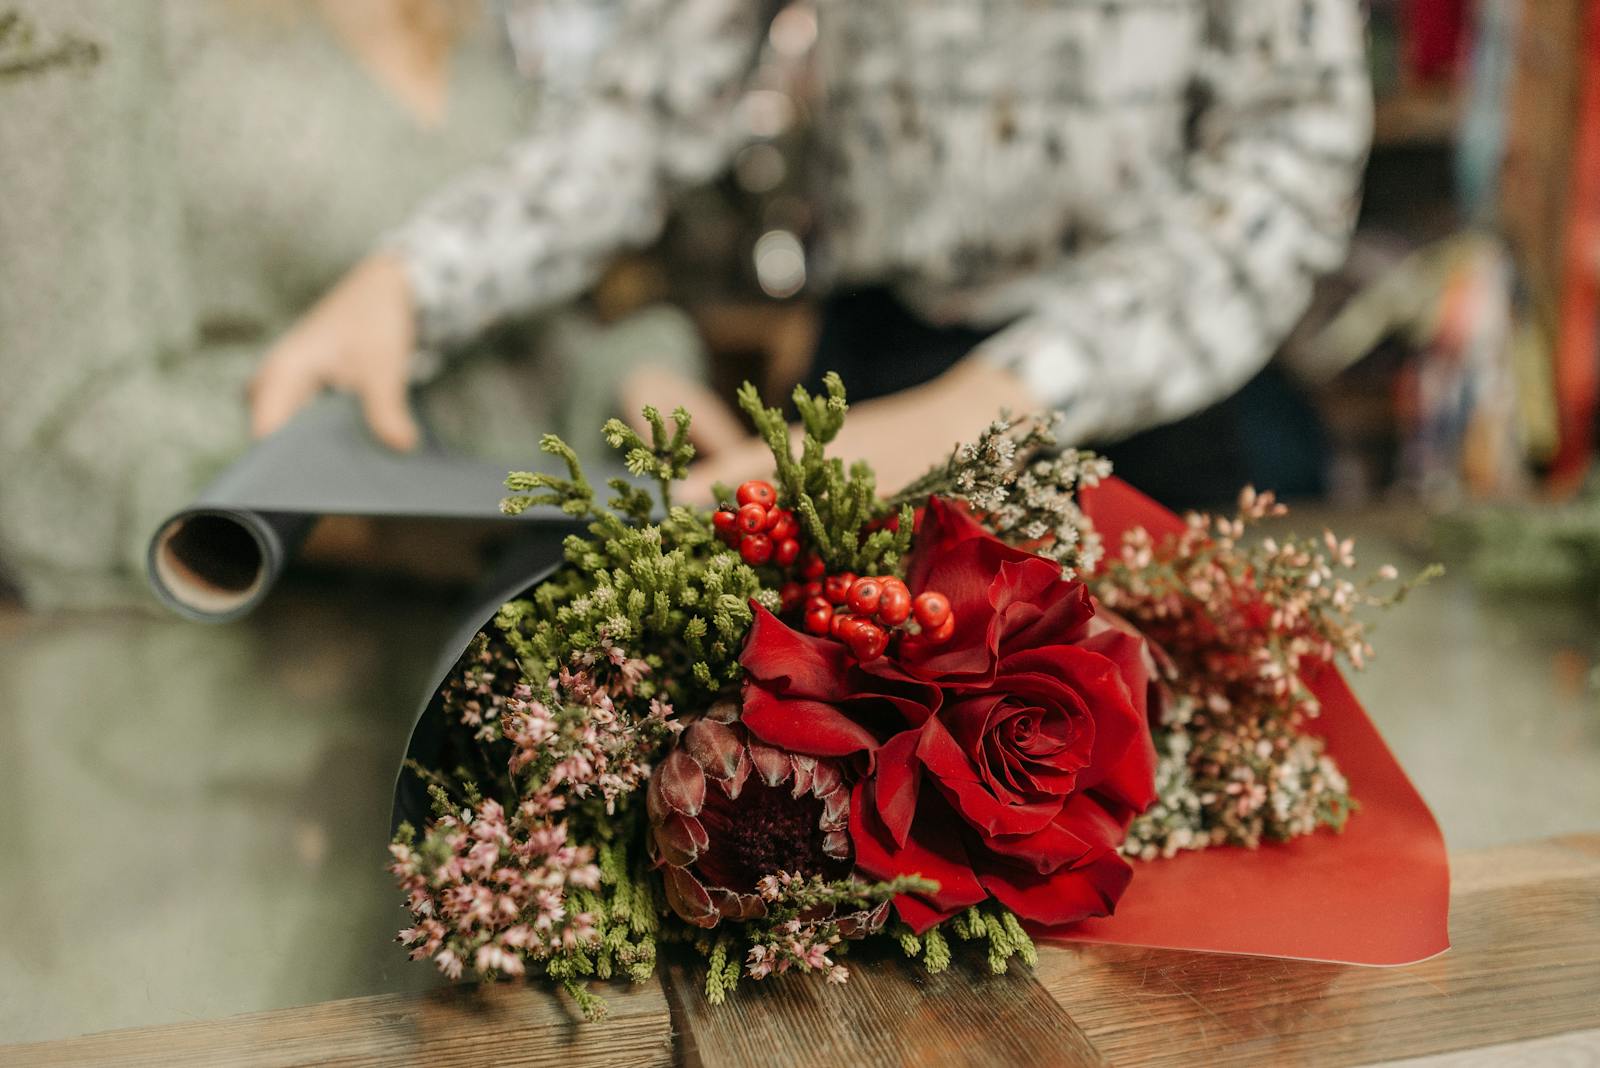
He or she should pick one or two focal flowers and one supporting bloom plus a filler for texture. Focal options at Trader Joe’s often include roses, hydrangeas, and peonies when in season; pair a focal bloom (large, showy) with smaller spray roses or ranunculus to fill gaps.
Limit the palette to three colors maximum to keep the bouquet cohesive: for Valentine’s, try deep red + blush + cream, or coral + peach + soft green.
Balance shapes and heights. Combine round heads (hydrangea, ranunculus) with spiky or linear elements (liatris, eucalyptus) for visual movement. Aim for odd numbers of each stem type—3, 5, or 7—to create a natural, florist-style arrangement.
Selecting Fresh Flowers and Fillers
They should shop early; stores restock in the morning and best stems sell fast. Look for firm, green stems, unblemished petals, and buds that are slightly open; avoid brown edges or limp foliage. Smell matters—damp or sour odors mean sitting water or age.
Pick fillers that add scent or structure: eucalyptus, baby’s breath, and chamomile work well. Buy extras of filler (one extra bunch) to pad awkward gaps. If using hydrangea, check for heavy, water-holding heads that won’t wilt quickly; bring home a hydration strategy for them.
Preparing Stems and Petals Like a Florist
Trim stems at a 45° angle with clean shears to increase water uptake. Remove leaves on the lower two-thirds of each stem to prevent water-borne bacteria. For woody stems like eucalyptus, strip the lower leaves completely.
Cut stems underwater or into warm water to reduce air embolisms for a longer vase life. For roses, gently remove guard petals and any thorns. Recut stems again before final arranging and place flowers in a vase with fresh, lukewarm water and a pinch of floral preservative or a teaspoon of sugar and a few drops of bleach to slow bacteria growth.
Arranging Your Valentine’s Day Bouquet Like a Pro
This section shows how to build a solid framework with greenery, place focal and filler flowers for balance, add volume with simple tricks, and finish with confident wrapping and styling choices.
Building Shape and Structure With Greenery
Start with a base of foliage to define height and silhouette. Use eucalyptus or long ruscus stems around the outside to create a soft halo; place them at varying angles so the bouquet reads layered, not flat. Trim stems at an angle and remove lower leaves that will sit below the water line.
Form a loose framework by crossing greenery stems in the hand—this creates a natural grid to hold flowers. Keep the central zone slightly higher for the focal blooms. If stems are floppy, add short picks or a rubber band at the midpoint to secure the structure before adding flowers.
Layering Flowers for a Balanced Look
Choose 2–3 focal blooms (roses, hydrangea clusters, or tulips) and space them evenly around the framework. Insert one focal flower, rotate the bouquet 90 degrees, then add the next; this ensures an even distribution from every viewing angle. Cut focal stems slightly longer than secondary stems for depth.
Fill gaps with spray roses, stock, or baby’s breath to soften transitions. Alternate textures—round roses, spiky stock, feathery chamomile—to avoid visual monotony. Step back frequently and view at vase height to check balance; adjust stem lengths by ½–1 inch rather than large cuts.
Creative Tricks for Volume and Whimsy
Twist or gently tease petals of sturdier flowers (like ranunculus) to create a fuller head without adding stems. Cluster small filler flowers in groups of three to five rather than scattering them; clusters read as intentional volume. Use a few unexpected elements—berry stems, seeded eucalyptus, or a single spray of pussy willow—to add movement.
Create illusion of abundance by staggering stem insertion: place a dense cluster near the center, then add airy pieces toward the edges. If a bouquet needs lift, trim a few stems shorter and push them into the center to form an inner mound. Secure the finished bouquet with a rubber band at the base of the heads to preserve shape.
Styling and Wrapping for a Perfect Gift
Choose wrapping that complements flower colors: kraft paper for rustic, white tissue for modern, or patterned bag paper for playful looks. Lay a paper sheet diagonally, place bouquet centers slightly above midline, then fold lower corner up and wrap sides snugly. Use floral tape or a rubber band to hold paper before tying.
Finish with ribbon tied in a tight bow and tuck a small card beneath the ribbon. For a florist-quality touch, trim stems squarely if placing in a vase, or wrap the stem ends in damp paper towel and a plastic sleeve when transporting. Present the bouquet slightly angled so the recipient sees the fuller side first.
More from Decluttering Mom: