


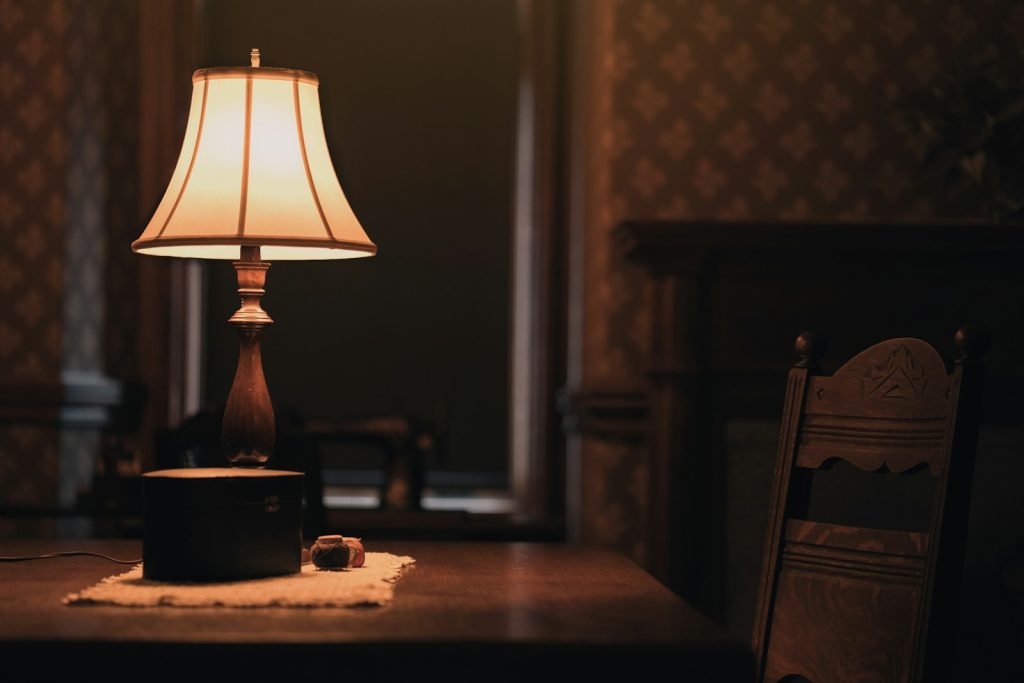
If you’re like me and love the charm of vintage lamps, you’ve probably wondered whether they’re safe to use in modern homes. The truth is, many vintage lamps carry wiring and materials that don’t meet today’s safety standards. Electricians warn that unless these lamps are carefully inspected and likely rewired, they can pose serious risks like electrical shorts or even fires. I’ve seen plenty of beautiful old lamps that look perfect on the outside but hide brittle or faulty wiring inside. It’s not always obvious without a professional check. That’s why understanding what to look for and when to call an expert is key to enjoying these nostalgic pieces without compromising safety.
In this post, I’m sharing what electricians highlight about vintage lamps, so you can keep your space both stylish and safe. Whether you’re shopping for a lamp or already own a vintage piece, knowing these tips will give you peace of mind.

Common Electrical Concerns With Vintage Lamps
When I look at vintage lighting, I think about the hidden issues beneath their charming surfaces. The real risks often come from old wiring, worn parts, and how well these lamps meet today’s electrical codes. These factors can affect both safety and performance.
Outdated Wiring and Associated Risks
Vintage lamps usually have wiring that’s decades old, which means insulation can become brittle or cracked. This increases the chance of exposed wires causing shocks or short circuits. Sometimes, the cords are cloth-covered, which looks cool but wears down easily.
Old wiring can also lead to arcing, where electricity jumps between disconnected wires, creating sparks and even fire hazards. Many vintage lamps have two-prong plugs without grounding, raising the risk of electric shock, especially with modern appliances.
Replacing or rewiring these lamps with UL-rated cords and grounded plugs is something I strongly recommend to avoid these risks.
Signs of Unsafe or Deteriorated Components
I always check the condition of the lamp’s cord, socket, and switch before using a vintage lamp. Look for cracks, frayed wires, discoloration, or corrosion. If the switch feels sticky or crackly when flipped, that’s a red flag.
A lamp that wobbles or has a cracked base can be a tipping hazard, too. Even if it looks fine, internal components might be compromised from age or previous repairs. Sometimes, sockets get worn inside, causing poor connections or overheating.
These visual and tactile checks help me avoid lamps that could cause shocks, fires, or mechanical accidents.
Understanding Electrical Codes and Modern Safety Standards
Most vintage lamps were made before current electrical codes existed, which means they don’t meet today’s safety requirements. For example, modern codes call for grounded plugs and heat-resistant materials that older lamps may lack.
Current standards control wiring thickness, insulation quality, and the type of switches and sockets used. Because of this, even lamps that worked fine decades ago can be unsafe now, especially if wiring or parts were replaced with non-certified materials.
To ensure safety, I look for professional rewiring or consider having an electrician update the fixture according to modern electrical codes. This step protects my home and makes vintage lamps much safer to enjoy.
For detailed safety information on vintage lighting and rewiring, you can visit the resource on vintage lamp electrical risks.
Health Hazards Found in Vintage Lighting
Vintage lamps can bring charm, but they may contain hidden health risks you should know about. These include harmful materials used in the past that aren’t safe by today’s standards.
Asbestos in Heat-Resistant Materials
Some older light fixtures used asbestos for heat resistance. Asbestos is a mineral fiber once praised for its fireproof qualities, often found in socket insulation or inside lampshades.
The problem is asbestos fibers can become airborne if disturbed during cleaning or rewiring. Breathing in these fibers is dangerous and linked to lung diseases.
If you suspect a vintage lamp contains asbestos, it’s best not to handle it yourself. A professional can safely check and remove or contain asbestos without exposing you to risk.
Presence of Lead in Paint and Solder
Lead was commonly used in paints and solder on vintage lighting before the 1970s. Lead paint often appears on metal parts and decorative elements of lamps. Solder containing lead holds electrical connections together inside the fixture.
Lead is toxic if ingested or inhaled as dust or fumes. Handling or restoring vintage lamps can release lead particles, which pose serious health issues.
I always recommend testing older fixtures for lead and having experts perform any restoration or rewiring that might disturb lead materials. Proper precautions help avoid exposure to this hazardous metal.
Other Potentially Dangerous Substances in Old Fixtures
Besides asbestos and lead, vintage lighting may include mercury components, especially in old fluorescent lamps, and sometimes even materials like cadmium in paints or finishes.
These substances are rare but can be harmful if the fixture is damaged or improperly handled. Mercury is particularly toxic and requires specialist removal.
When working with or buying vintage lamps, it’s important to keep these risks in mind. Having a qualified professional assess and restore fixtures ensures you avoid health hazards and keep your home safe. For more information on safely handling vintage lighting, check this detailed guide on vintage lamp safety.
Safe Shopping and Restoration Tips for Vintage Lamps
When buying vintage lamps, knowing what to look for can save you from safety hazards and costly fixes later. Checking wiring condition, understanding thrifting limitations, and trusting professionals with rewiring are crucial steps I always follow.
Inspecting Lamps Before Purchase
Before bringing a vintage lamp home, I closely examine the lamp cord and plug for fraying, cracks, or brittle spots. Old cloth-covered cords are cute but often unsafe and need replacement. I also check for discoloration or burn marks near the socket—both signs of electrical issues.
If possible, I test the lamp with a bulb, watching for flickering or sparks. Loose switches or wobbly parts make me pause. Even if everything looks good, internal wiring can be damaged, so a professional check is essential once I own the lamp.
Thrifting Dos and Don’ts
Thrift stores offer a treasure trove of vintage lamps, but I avoid any overhead hardwired fixtures like chandeliers there. These require special inspection and installation that thrift shops can’t guarantee.
When thrifting, I focus on table or floor lamps where the cord is visible and easier to assess. Buying lamps with stamped dates or original manufacturer marks helps know the era and potential hazards.
I never buy lamps with visible damage to wiring or sockets. It’s better to find a clean, intact piece that I can trust to restore safely rather than gamble on one with hidden problems.
Importance of Professional Lamp Rewiring
Once a lamp is home, I never attempt rewiring myself. I hire a licensed electrician who can replace the lamp cord, ground wires, sockets, and switches with modern, code-compliant parts while preserving the lamp’s vintage look.
Proper rewiring lowers fire risk and ensures the lamp works safely with today’s electrical systems. Professionals can also source period-appropriate materials and maintain the original aesthetic, something I value a lot.
Choosing professional restoration means the lamp stays both beautiful and safe, ready to brighten my space without worry. For detailed guidance on restoration, check this vintage lamp safety and rewiring resource.
How To Rewire a Vintage Lamp the Right Way
Rewiring a vintage lamp takes some patience and the right tools. Knowing the exact steps and materials to use ensures safety and preserves the lamp’s charm. If any part feels tricky or unsafe, it’s better to get expert help.
Step-By-Step Rewiring Guide
First, always unplug the lamp before starting. Then, remove the lampshade and bulb. Use a screwdriver to open the lamp socket and carefully detach the old cord.
Next, strip about half an inch of insulation from the new lamp cord’s wires. Connect the wires to the correct terminals on the socket—usually, the ribbed wire goes to the neutral side and the smooth wire to the live side. Secure the socket back in place.
Finally, test the lamp by plugging it in and turning it on. Ensure everything is working properly and that no bare wires are exposed.
Tools and Materials Needed
You’ll want a lamp rewiring kit that includes a new socket, cord, plug, and any nuts or washers needed. Also, use a wire stripper to cleanly remove insulation without damaging wires.
A screwdriver and needle-nose pliers come in handy to open the lamp and twist wires tightly onto terminals. Electrical tape adds extra security to connections. A multimeter is useful to check for continuity after wiring, ensuring your work is safe.
Having proper materials helps avoid future electrical hazards and makes the lamp safer to use.
When To Call an Electrician
If the lamp’s wiring looks complicated, or you find frayed, brittle cords hidden inside, it’s smart to call a professional. Lamps with unusual sockets or damaged metal parts may need expert attention.
Electricians can replace cords with UL-listed parts and update plugs to grounded versions. This reduces fire risks and ensures the lamp meets current electrical codes.
If you’re not confident with basic wiring, or the lamp has sentimental value, paying for a pro’s help protects you and your home. It’s often a small price compared to the dangers of faulty rewiring.
For detailed instructions and safety tips on how to rewire an old vintage lamp yourself, visit Renee Renovates.